Love Bird Cookies

Ok, aren't these the cutest cookies? I may be a bit biased. After all I did make them.
But, they are cute. You know they are.
I hope everyone had a great weekend. My weekend was pretty fabulous. We took our four year old daughter to her first parade. You would think that she would have been to one already, but nope. She was born in Germany. This is the first year we've been in town to go.
She did pretty good. She screamed and waved for beads like a true New Orleans girl......but she quit on us way to early. Lucky for us, our friends brought their camper and had it parked for tired children and small babies.
My hubby was all too happy to lay back in a chair and do kid watch. He's not from New Orleans....he's a Texas boy.
He'll never like parades like I do. It's a sad thing.
So that was my weekend....screaming and acting a fool for some cheap beads.
These cookies were pretty easy to make. Wanna learn how?
Ok here's what you do.....

Roll out cookie dough with a heart shaped cookie cutter. Need a good cookie recipe? You can get mine
. Then cut the hearts in half. I used my dough scraper to cut these. A pizza cutter would work well also.
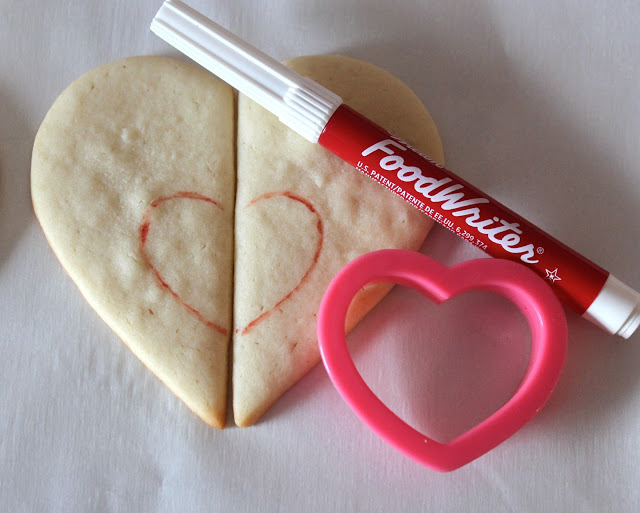
With a food safe marker and a small heart cutter, trace half of a heart on the cookies towards the bottom center. This will make the birds' wings. Tracing the shape keeps things symmetrical.
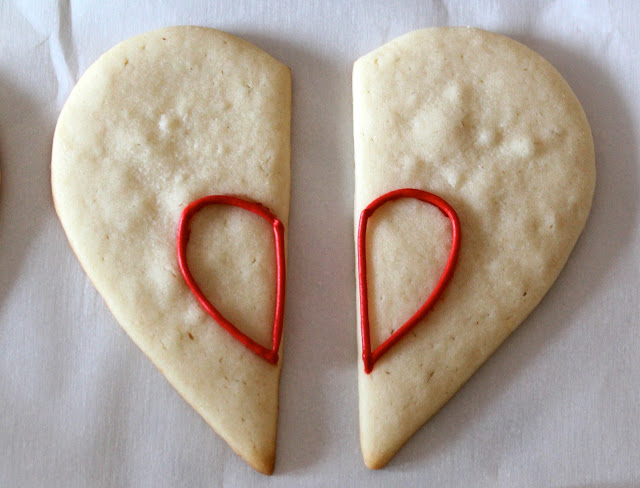
With a #2 tip and red royal piping icing, outline each bird's wing. To get this color red I used
and a tiny bit of
.

Fill in wings with flood consistency red royal icing. Let dry. This helps prevent the colors bleeding.
After the red wings are dry, outline bird's body with blue piping consistency royal icing and a #2 tip.

With flood consistency blue royal icing, fill in bird's body. Let dry overnight.

Using a #12 tip and a little thicker than flood consistency icing, add whites of eyes.
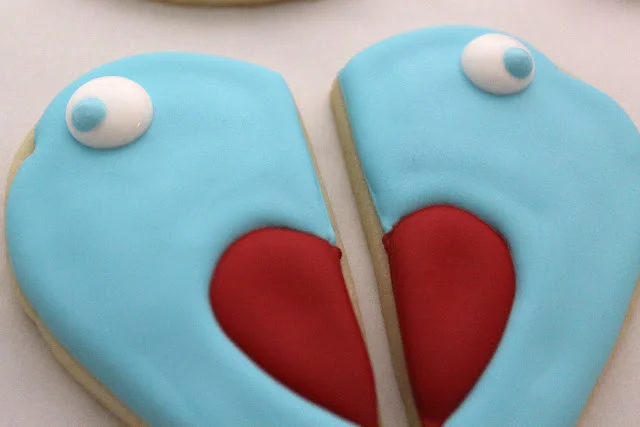
While whites of eyes are still wet, pipe a blue dot using a #4 tip and blue royal icing. I used the same consistency as the whites of eyes.

Add black dot to eye with a #2 tip and black royal icing. Once again same consistency as white and blue of eye.
Add an orange beak. Let cookie dry.

Have a Happy Monday!