Love Bird Cookies
Remember acting like little love birds. Always holding hands, kissing, using mushy love talk. Yeah, those were the days.
The days before you had to clean his hair out of the sink from his morning shave......before you had to pick up his dirty clothes off the floor.......and before you knew of all his disgusting habits. You remember the days before that right?
Those were the days......
Well my hubby and I are still like love birds.....and he doesn't have any disgusting habits.....he even picks up all his dirty clothes and puts them in the properly sorted laundry baskets.......
AHHHHH YEAH RIGHT!!!! Totally Fantasy.....but it's a good fantasy.
Well this fantasy got me thinking about cookies. Then again, everything has me thinking about cookies.
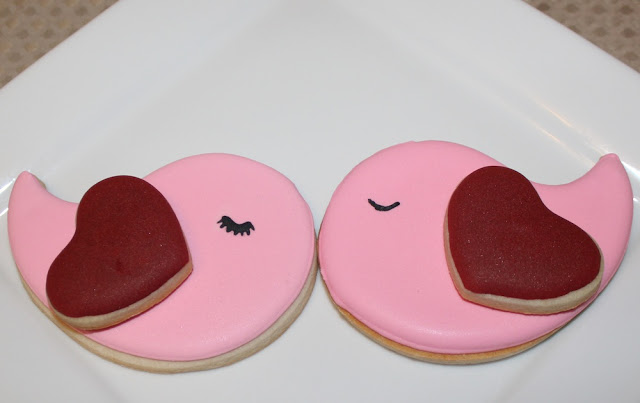
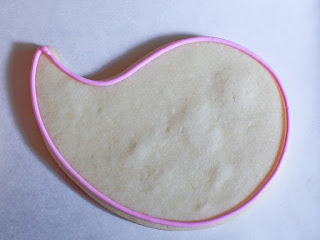
I bought this paisley cutter from Ecrandal right before Christmas and never got around to using it. I knew when I saw it, I was going to use it for quite a few things. Mainly I wanted it to make birds. So, when I started thinking of love birds I was so excited to use my new cutter.
First roll out your dough and cut out paisley shapes and a heart shapes.
Bake according to your recipe directions.
**TIP: If you want birds facing each other be sure to flip some of the paisley shapes BEFORE baking. Otherwise you have to decorate the back of the cookie. Which isn't the end of the world, but isn't how I wanted to do mine.
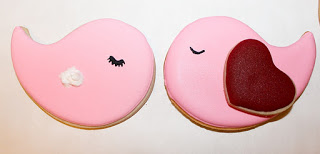
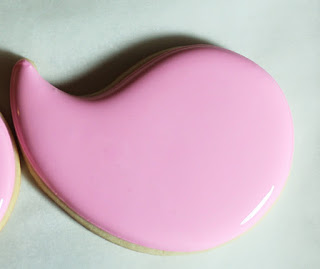
Using pink royal icing and a #2 tip, outline cookie.
With pink flood icing, fill entire cookie. Let dry overnight.
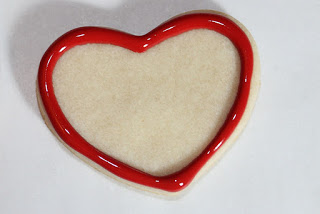
Outline heart cookie with red royal icing. I just used the bottle of flood icing. About 20 second consistency. I didn't feel like putting it in a bag :)
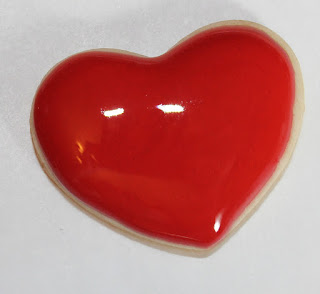
Then Fill with the red 20 second icing. Let dry overnight.
Add eyes. You could use black candy beads if you're not comfortable piping.
Then add a dab of royal icing and lay heart on top for wing. Be sure your hearts are completely dry to prevent sticking your finger in them like I did and making a dent.
Allow several hours for icing to dry under the wing.