3D Ducky Pull Toy Cookie

My baby boy turned 5 months old Monday!

The months are flying by and he's doing all sorts of new things.

He can roll over, he has two teeth, I have five new grey hairs, and the doctor started him on fruits and veggies. He LOVES to eat.

I can't wait until he's walking around dragging toys behind him.

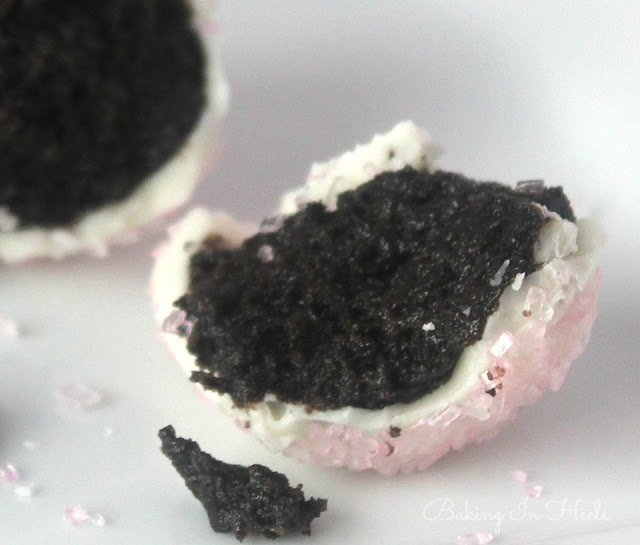
Remember the old duck pull toy? Old toys are the best. They were plain and simple, just like these cookies. These cookies look cute yet there wasn't much decorating to be done. They were really easy to make.

For each duck pull toy cookie you will need:

4 small circle cookies
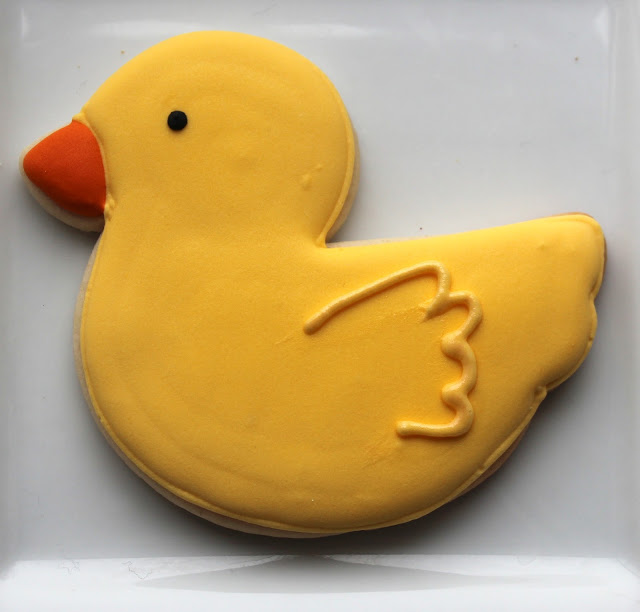
1 duck cookie

Royal icing (yellow, orange, white, and black)

yellow sprinkles or sanding sugar

string

Duck Pull Toy Cookie

Outline and fill small circle cookies and allow to dry. You will need four for each duck. These will be the wheels for the duck toy.

 Outline and fill duck cookie with yellow royal icing. Allow to dry several hours.

 Outline and fill duck bill with orange royal icing.

 Add a black dot of icing with a #1 tip and black royal icing.

 Add some squiggly lines for duck feathers.

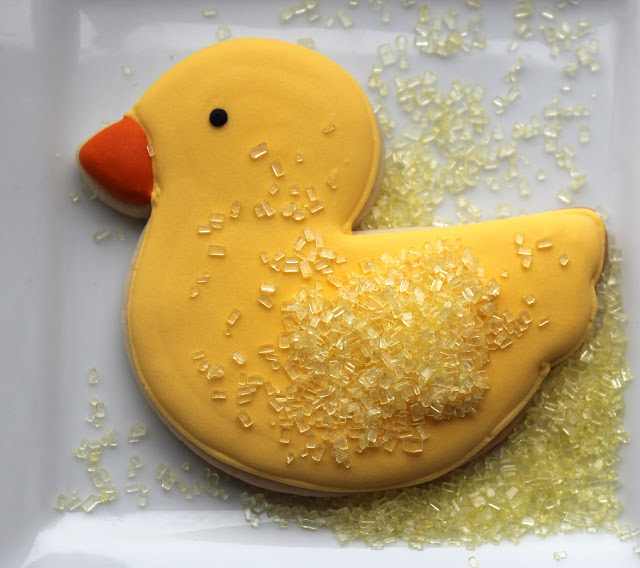
While the feathers are still wet, sprinkle with some yellow sprinkles or sanding sugar.

Let dry then shake off excess sprinkles.

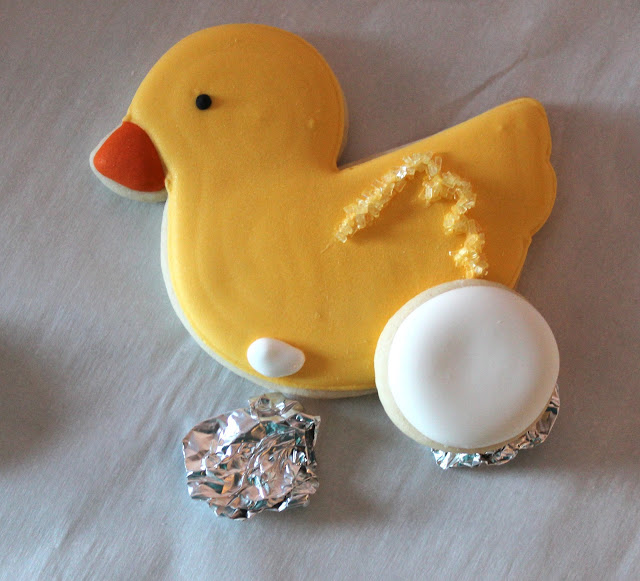
Add a dab of thickish royal icing. You can use yellow. I used white...it's what I had left over.

Here's where it gets all fancy. Get a piece of aluminum foil and scrunch it up. Place it along side the cookie. This will hold the end of the circle cookie upright. Place circle cookie on top of the foil and dab of icing. Do this for both wheels. Allow to dry overnight.

After the cookie has dried overnight, flip it over and add two wheels to other side.  Place aluminum foil between the two wheels while it dries. Let dry about 6 hours.

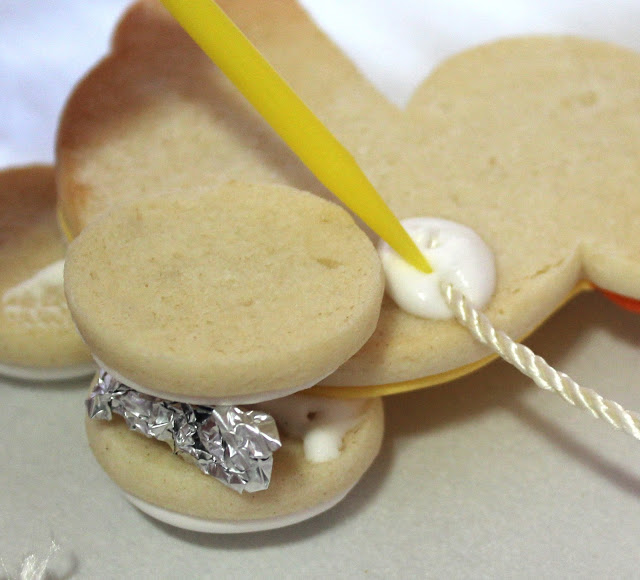
Add a dab of thickish white icing on the back of cookie to hold pull string. Use a

boo boo stick

to push the string down into the icing. Allow to dry.

These would be great for a baby shower or a baby's first birthday party.  They would even be cute decorated in pink or blue!

Hope everyone had a great week. We have lots of changes going on in our house this week.  I'm still working on a schedule so I can bake, blog and take care of the family without draining myself of all  available energy and brain cells.

When do y'all do your baking and blogging? Are you a late night blogger or do you get it all done over the weekend?

Valentine Oreo Balls

Yesterday, I'm in Walmart getting some deli meat with my Starbucks coffee sitting in my basket, shopping cart....whatever y'all wanna call it. I pick the cup up and.... SMOOSH.....it completely caves in sending hot coffee all over the front of my white shirt.

I quickly grab my sliced turkey and head to the women's clothing department. They have such great selections (not), I wanted to buy a shirt and go change in the bathroom. So I grab a Minnie Mouse shirt and head for the check out line. Wouldn't ya know the lines were very long. Last minute Valentine's day shoppers.

I know, I'll check out in the jewelry department. So I walk up and ask if I can make my purchase here. The lady says....sure, I'll be a minute I have to finish emptying this box....ummm seriously. So I wait for what seems like an eternity and finally she comes to ring me up.

Wait....it get's better.

I mention spilling coffee all over me and she asked if it was hot......Ummmm it's coffee YES IT'S HOT. I nicely tell her yes and no joke, she asked me if it hurt......

Ummmm let me see......hot coffee.....spilled down my entire shirt.....Yes it hurt....DUH.

So my quick Walmart run was not so quick and a huge disaster.

I made up for it later by drowning myself in Oreo balls. Have you ever had an Oreo ball???? They really are amazing......and a quick, non-disastrous desert.

Valentine Oreo Balls

To make these you will need the following:

1 pkg double stuffed Oreos (crushed in your food processor)

1 8oz pkg of cream cheese, room temp

1 pkg of Almond Bark

pink and silver sprinkles

 Place crushed oreos and cream cheese in a mixing bowl or in your stand mixer. My Kitchen Aid bowl was dirty and I was too lazy to wash it.....hey, it happens.

 Mix until well combined.

 Give these beaters full of gooey goodness to your cute child or eat yourself. If this is for yourself, turn off mixer first.

 Take 1 Tbsp and roll into a ball with your hands. Place on a cookie sheet lined with parchment paper. 

Place them in the fridge for an hour. If you're in a hurry you can place in the freezer for about ten minutes. When you are ready to take them out, melt the almond bark in a microwave safe bowl. I do this 30 seconds at a time, mix, then reheat until completely melted.

 Take Oreo balls out of the fridge/freezer and place one into the melted bark. Pick up with a fork and tap to shake off excess.

Place in a bowl of sprinkles. Don't worry about covering the top that is showing....that will be the bottom of your Oreo ball. You need to cover with the sprinkles quickly because the almond bark hardens fast with the Oreo ball being cold. Place on parchment paper. Keep in the fridge until serving.

You can add tiny heart sprinkles as an alternative. These

little heart sprinkles

were sent to me in an order from

Karen's Cookies

.

So gooey and delicious.

Hope everyone is having a fabulous week!