The Cat In The Hat Cookies and The Baby's Nursery....

Don't you just love Dr Seuss? I know I do! These cat in the hat cookies were inspired by my latest project......Wanna know what I've been up to?
It's been a while hasn't it. Seems like forever since I've last blogged.....or baked for that matter.
Shortly after I was taken off of bed rest, my husband retired from the military. With two injured knees, he was medically retired and we had just about two weeks notice before moving.......pregnant with five kids in tow. Talk about stressful.
For someone like me (a major control freak), this was something that was going to be hard for me. After all there was no way I was going to be able to pack a thing....doctor's orders.
So there I was laying on the sofa watching my husband and the two older girls pack. After about the eighth box they had to label "cookie room" they started to tell me I wasn't allowed to buy anymore cookie stuff.
Funny aren't they....NOT.
They said that about everything I owned.....with the exception of my shoes. Maybe they are hoping to inherit those after I'm gone.
We've been busy getting the house in order and unpacking as much as we can. If I never see another moving box again, it will be fine by me.
What didn't get unpacked was stuck in the garage. They can get unpacked at another time.
The house we decided to buy was my mother-in-laws. It's been for sale for a while and needed lots of updating.....this was a project I decided to take on in my third trimester of pregnancy.....lol.
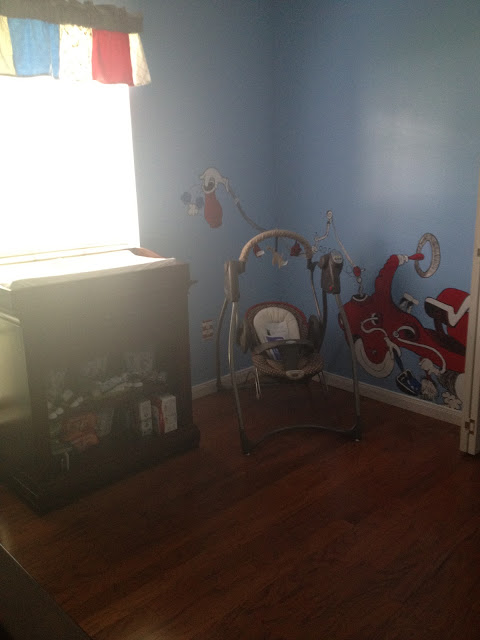
We've made many changes in the house, but the one I'm most excited about is the baby's nursery. I decided to take a stab at doing a mural on the baby's walls. I am NOT an artist by any means. My mother-in-law lent me a projector for this project and boy did it come in handy. After using it I knew I wanted a KopyKake projector for cookies. I'll be ordering one of those sometime this week.
After the nursery was painted, I put down the wood floors and the nursery was finally complete!
I just have to hang the baby's name behind the bed and get a rug.
Wanna see all the hard work???


Well as you can tell I've been busy....but I'm back in my newly designed kitchen just baking my little heart out.
What has everyone else been up to? I've missed y'all!
