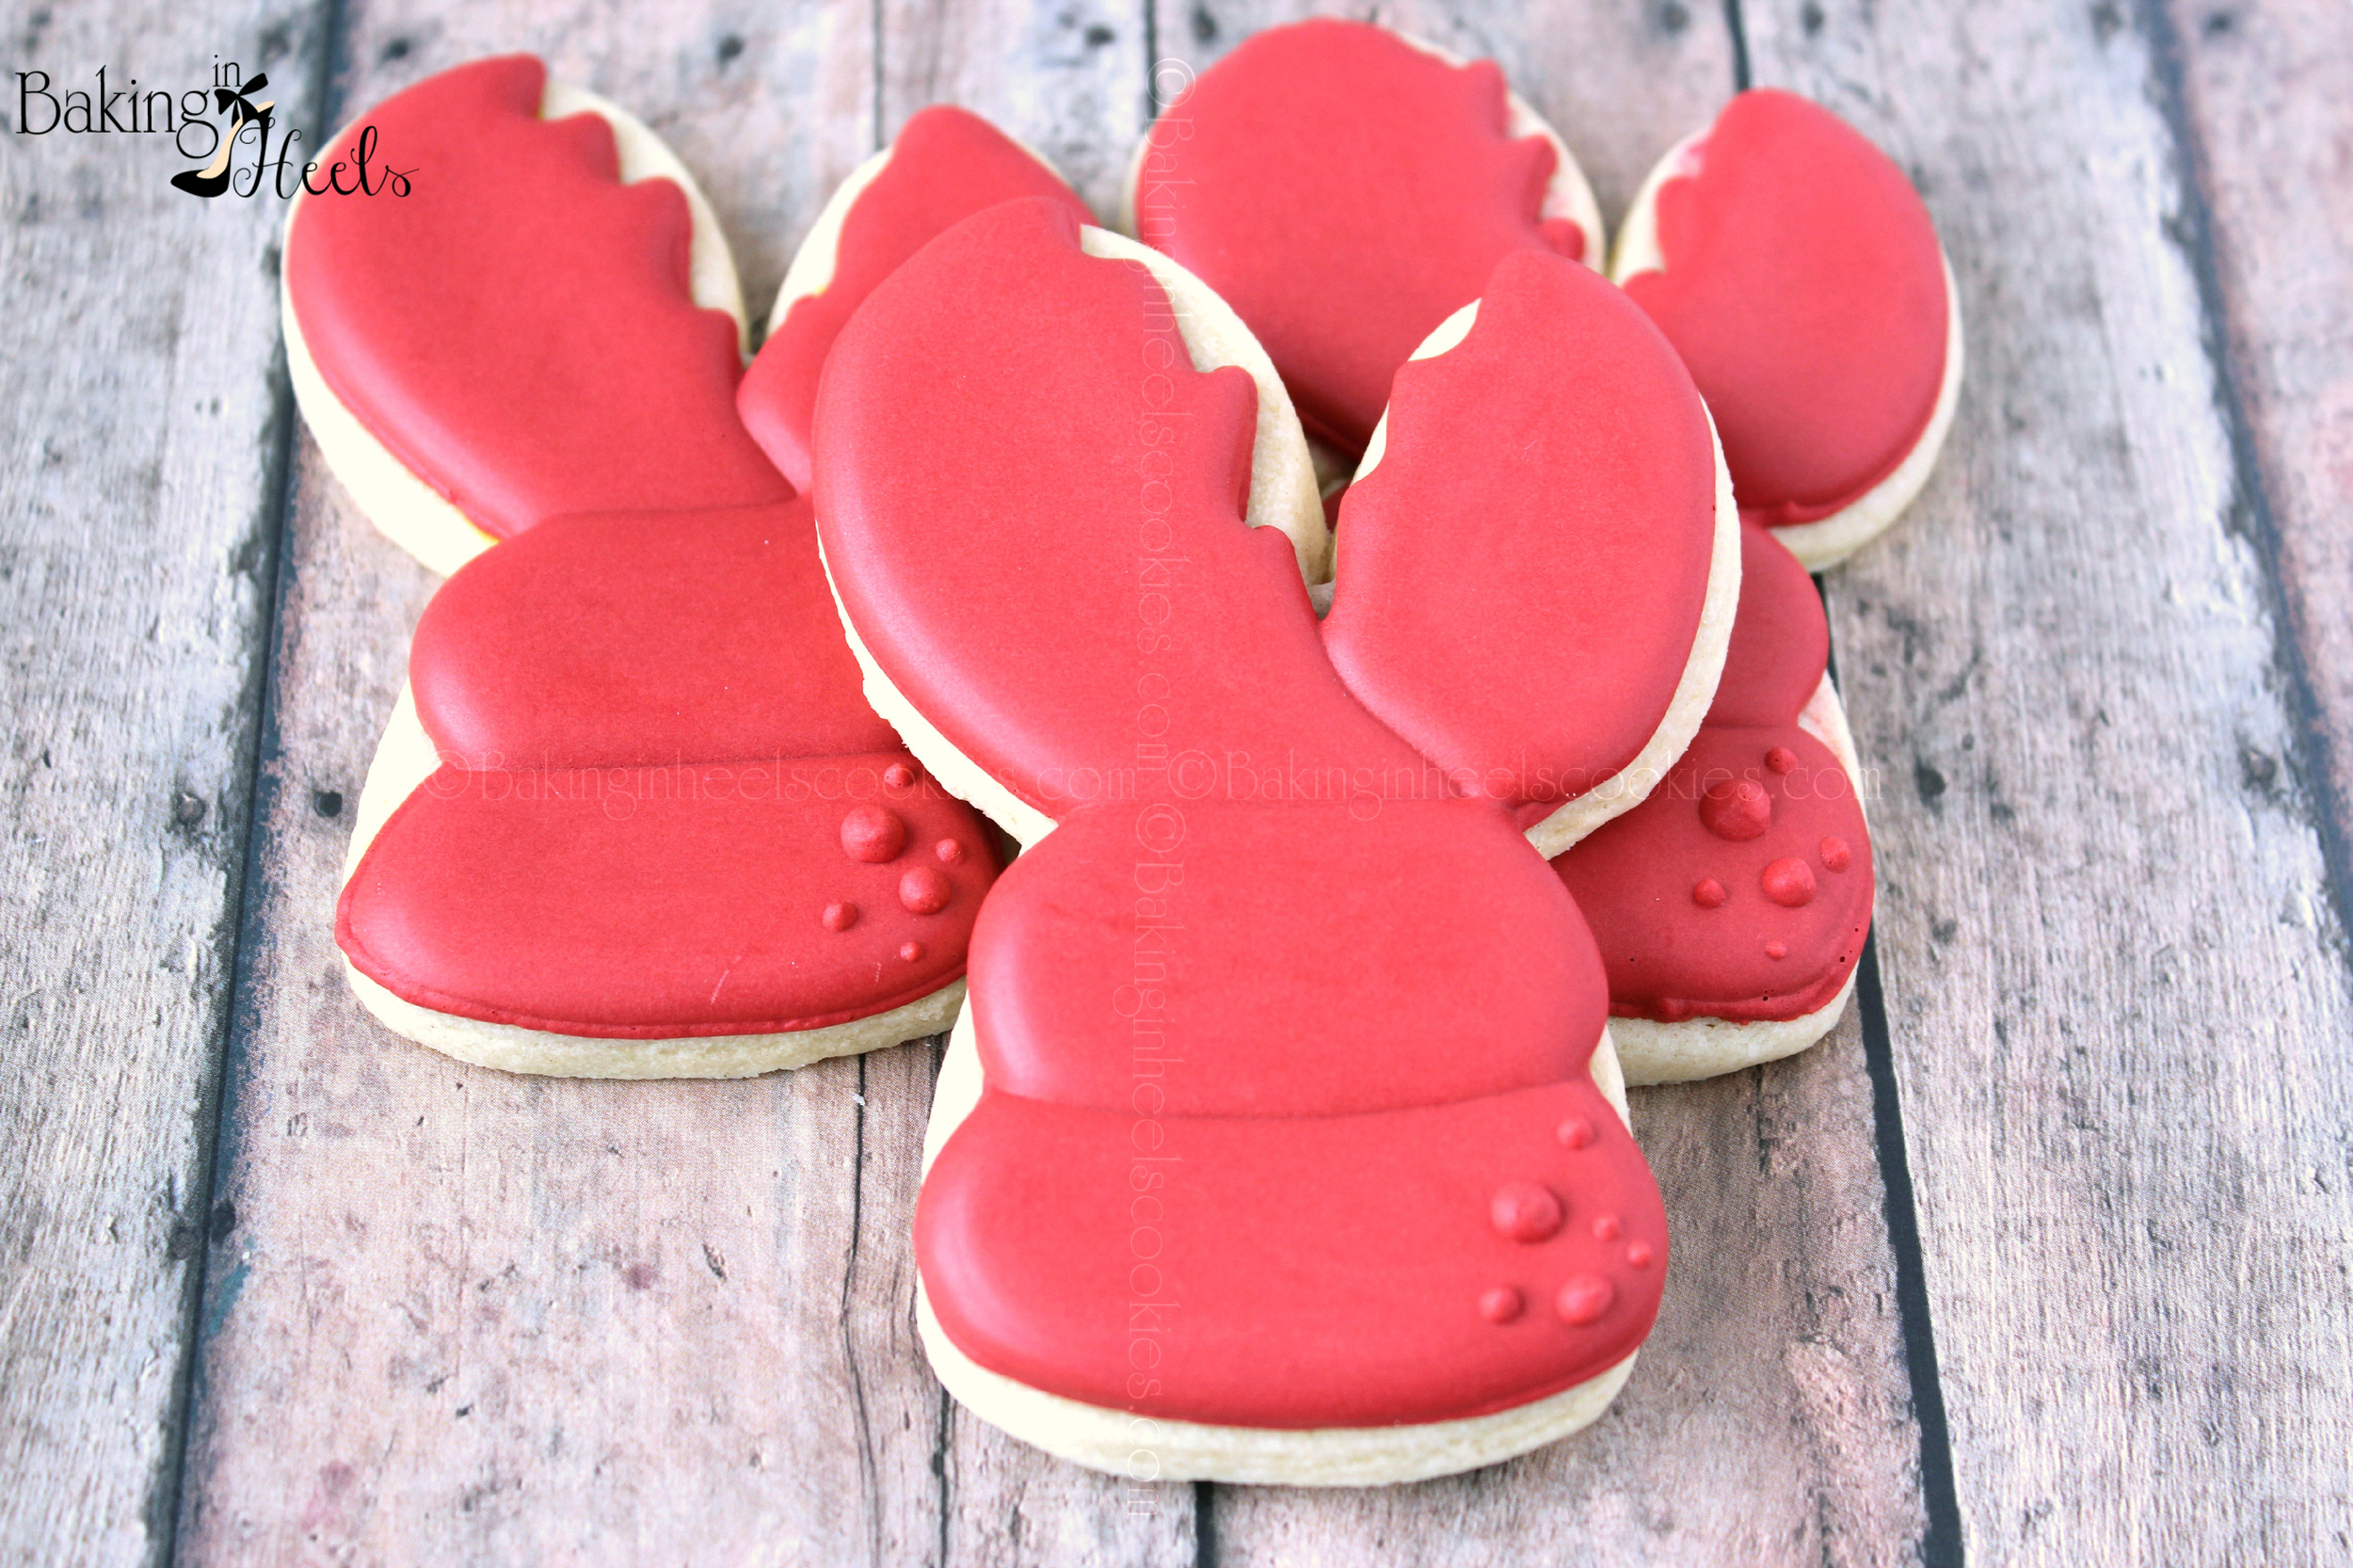
Easy Crab Claw Cookies

Summer break is almost over.  I have to admit, I'm not looking forward to the kids returning to school......even though it will be much quieter around here.

I've been so busy with cookie orders that there hasn't been much time for posting tutorials. I made these a while back and never got around to sharing them with you. 

This cookie cutter has quickly became one of my favorite cutters. I know you probably think I must work for Whisked Away Cutters, but I don't. I just love her cutters and they really have been versatile. 

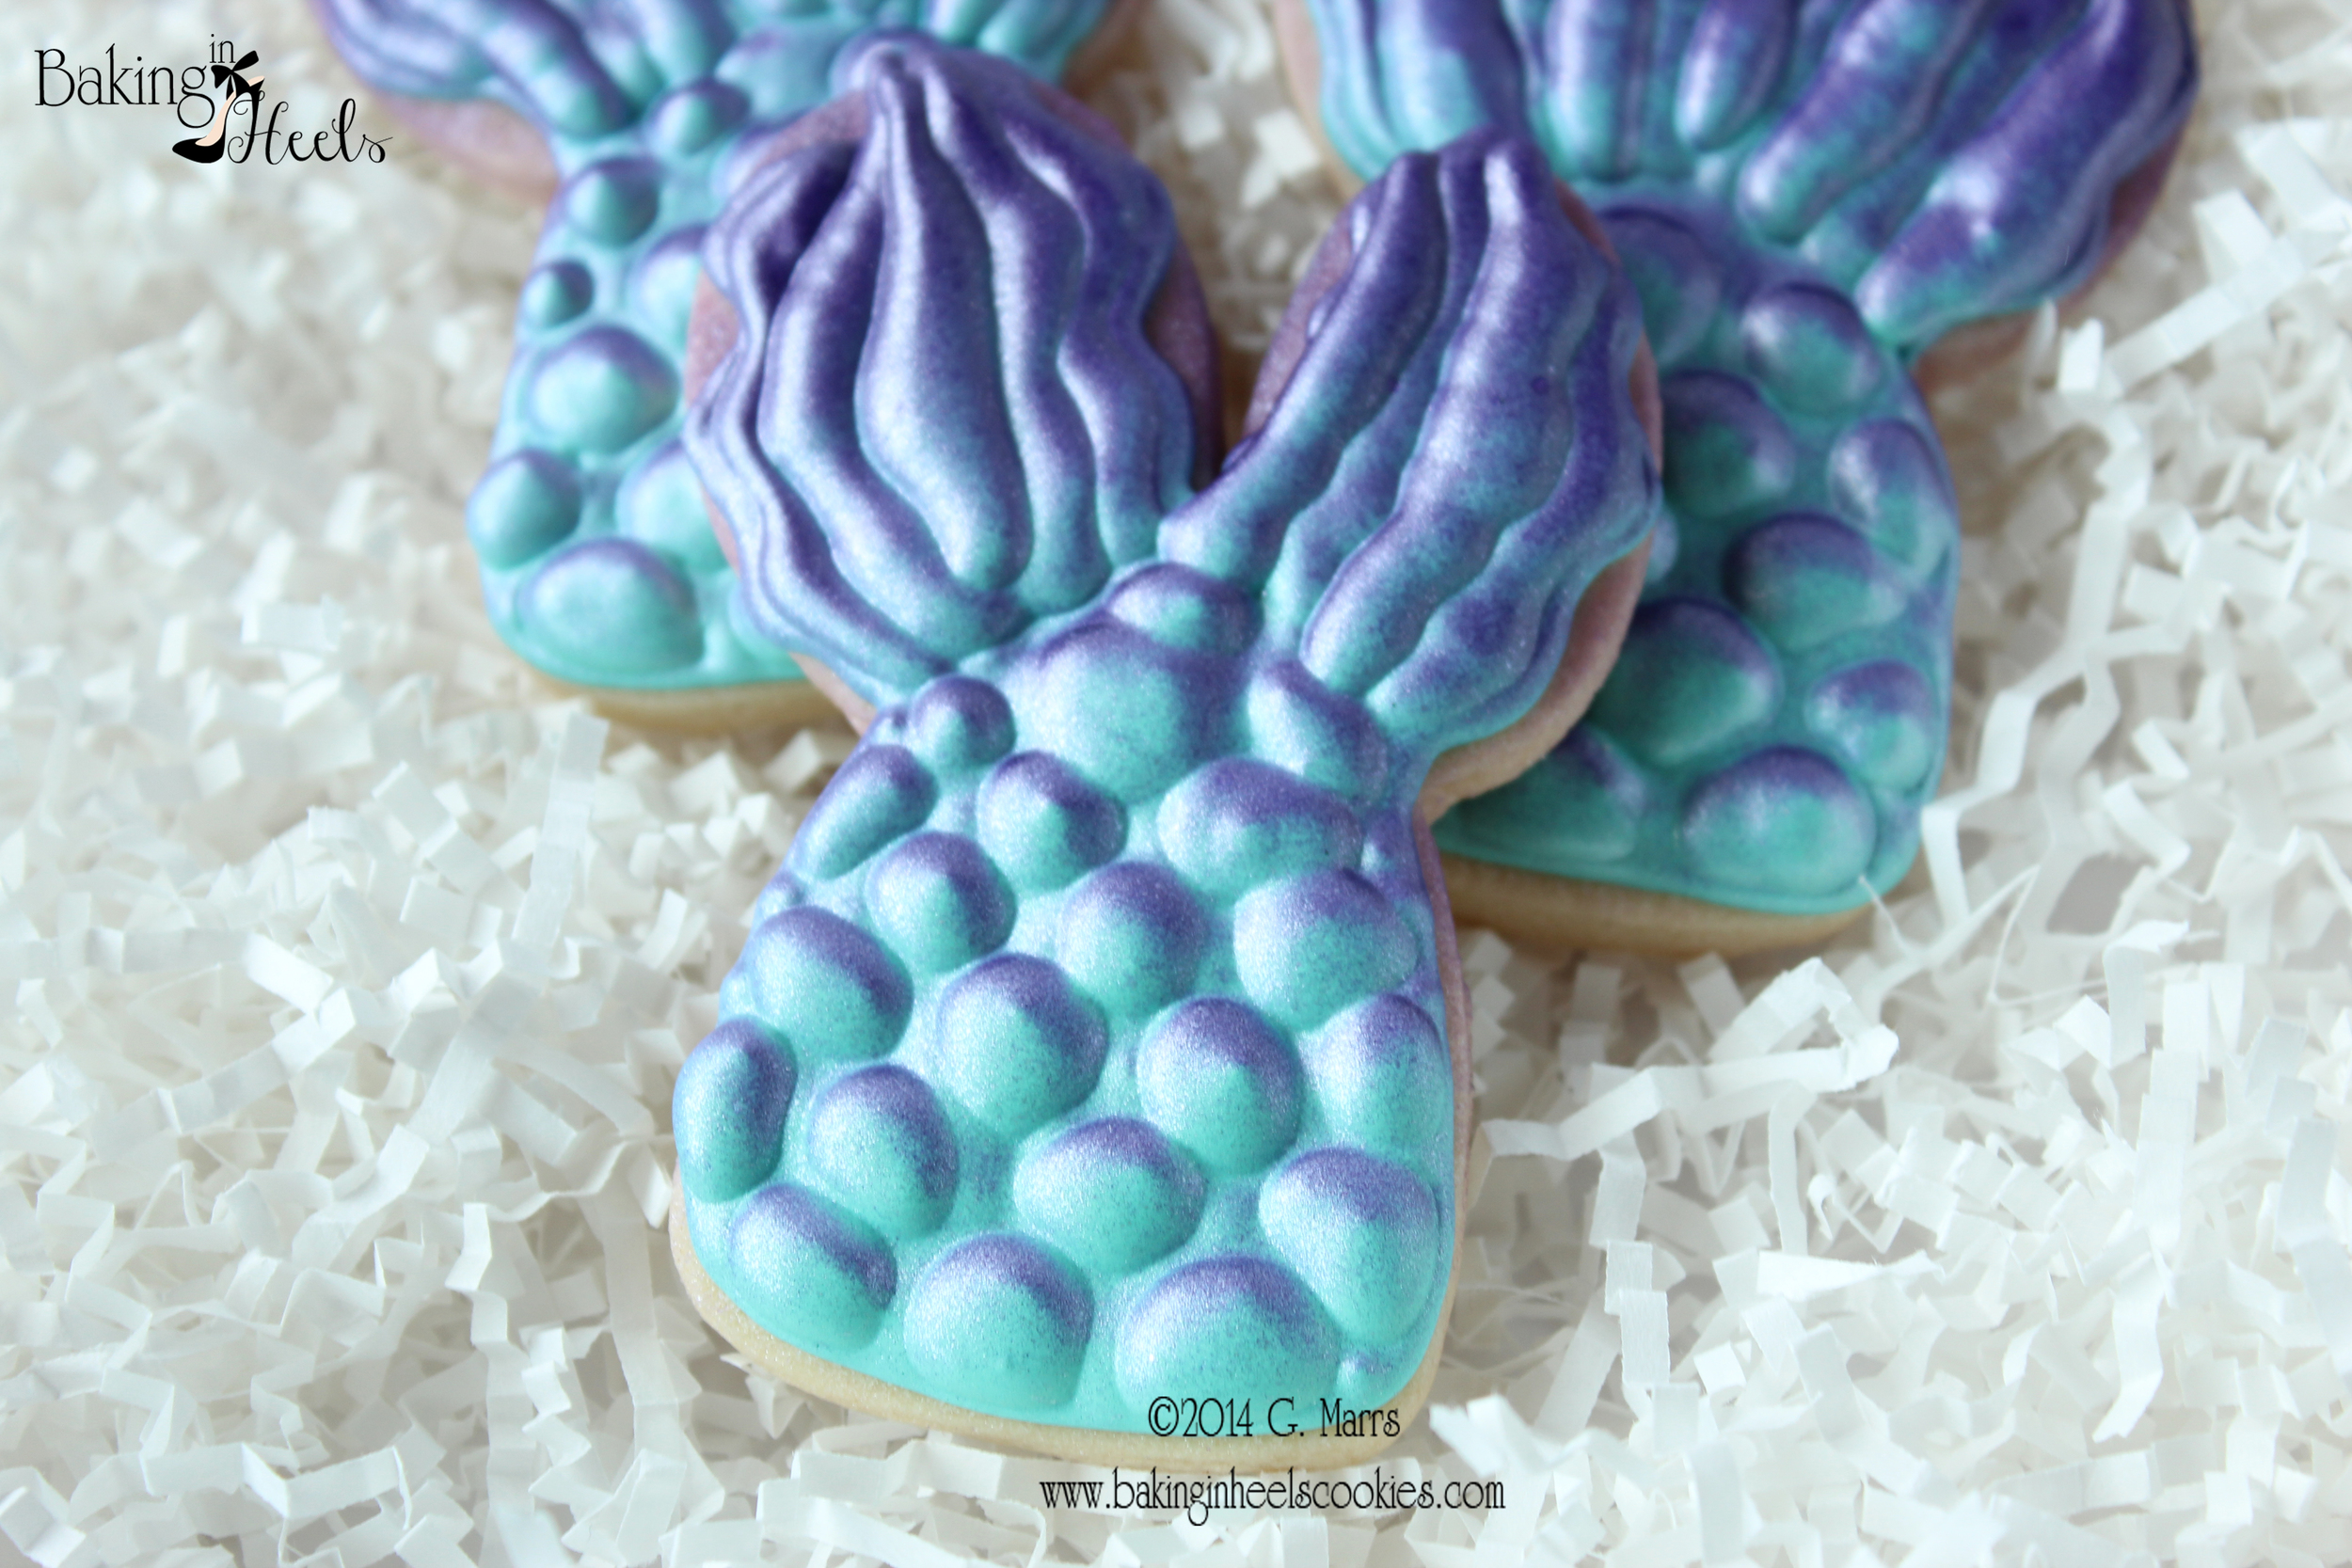
I've used it to make Mermaid Tails and these Crab Claws. I also have a few other designs that I will be showing you at a later date. 

Enough chatting and on with the tutorial. 

To make these super easy crab claw cookies you will need:

1. Outline with red icing and a #2 tip 

2. Fill in two of the sections that are NOT next to each other. Allow to dry until icing crust over (between 30 min-1 hr ...times will vary)

3. Fill in remaining sections and allow to dry completely. 

4. With red icing and a #2 tip add some little dots for accents.....crabs have bumps on their shells ya know. Let dry.

What different "outside the box" cookies have you made with your cutters? What's your most used cutter?

How to Make Mermaid Tail Cookies

It seems 3-d printers are the new big thing in cookie cutters lately.  I have ordered quite a few cookie cutters from several different companies. All of which I equally love. In my opinion the best cookie cutters are made by those who are cookie decorators. Cookie decorators just know what works for cookies.....avoiding small easy breakable sections and such. 

Sometime in April, Tracy of Whisked Away Cutters opened her Etsy store. I was NOT in the first group of those lucky enough to snag some of her cutters. They went really fast. I did however make up for that later when she restocked. Let me say first that her cutters are AMAZING! 

One of the cutters I purchased was the Bun Bun cutter. The bunny design this cutter was intended for is extremely cute, but there wasn't time for Easter cutters when I ordered so the Bun Bun cutter sat on my desk waiting for next year. 

That was until the light bulb went off.....Mermaid tails!!! 

To make the mermaid tails you will need:

  • Baked cookies made with the Bun Bun Cutter.
  • royal icing in turquoise (I use 20ish second icing to outline and fill)
  • #2 tip and coupler 
  • piping bag
  • airbrush 
  • Regal Purple airbrush coloring 
  • Pearl Sheen airbrush coloring
  • patience (time is needed in between filling scallops)
mermaid3.jpg

1. Outline using a #2 tip and turquoise royal icing

2. Pipe a row of scallops.

3. Continue piping scallops to the end of the cookie.

mermaid4.jpg

4. Fill the top top portion of the tail with turquoise icing. Allow to dry for an hour or two. (You can also do the tail in sections like pictured below. For the ones in the picture below I took a #3 tip and piped some thick squiggly lines, leaving spaces in between. 

5. (picture not shown) Fill in scallops alternating every other section and let dry for about an hour, then fill in remaining sections. It needs time to dry before doing a section right next to the one you did. 

6.  Take your airbrush (DON'T BE AFRAID OF YOUR AIRBRUSH) and using Americolor regal purple airbrush color lightly spray the mermaid tails until you have your desired color. Allow to dry. Then I took some Americolor pearl sheen and sprayed the entire cookie. I love the shimmery look.  

I really love when I can use a cutter for multiple designs. I have a few more designs in mind for this cutter. So check back, I'll be posting them at a later date. 

Do you ever think outside the box with your cutters? Tell me what you've made in the comments below. 

For more "outside the box" cookie designs see the links below:

  1. Simple Baby Chick in Bunny Costume via Cookies With Character
  2. Skunk Face Cookies via Sweet Sugarbelle