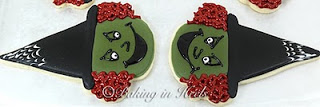
Royal Icing Tutorial

First I want to say there is no exact way to make royal icing.  Everyone does their's differently.  Some add more sugar, some more extract, and some more meringue powder. You need to find the one that you like. This is the recipe I use.....It's what works for me. 

Royal Icing

4 Tbsp meringue powder 

4 cups confectioners sugar

(sifted)

1/2 cup water

1 tsp clear extract

First combine meringue powder and water. Using whisk attachment. Whisk on med/high speed.

Whisk until foamy.

Add confectioners sugar a little at a time. I do this 1/2 cup at a time and combine thoroughly before adding another 1/2 cup.

Scrapping down sides as needed.
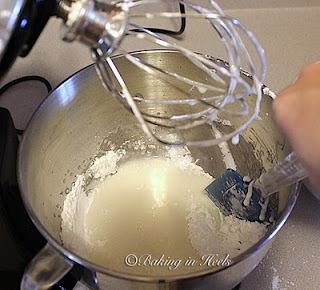
 After it's all mixed together, add clear extract of choice. 

Now mix on med/high speed until high peaks formed about 5-6 minutes.

 Picture below is a "NOT READY" picture so you can see the difference. 

Now, it's done. High peaks. 

Attachment will stand alone in mixer. 
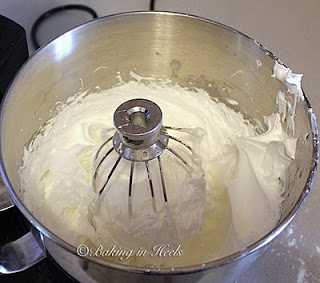
Add water a little at a time to get the consistency you need. 

Okay moving on to consistency of royal icing.....

Now everyone has different opinions on what consistency icing should be. Find what works for you. The humidity where you live also is a factor in your icing consistency.  So use trial and error when making it. This is just the way I do it.....it's what works for me. 

Just so you all know I TOTALLY hate doing video tutorials.....COMPLETELY.

First of all I hate how I sound. Have you ever listened to a recording of yourself? Yeah, you know exactly what I'm talking about. 

Then there's the issue of looking ten pounds heavier in a video. Yep, you really do. It was not the extra cookies or cupcakes I had to eat so that they wouldn't go to waste, nope its the camera.

So forget me getting in front of the camera....NO WAY....sorry, you get to look at a boring plate instead.

BUT.........

I did make the tutorial for you. Nothing major or detailed, just a simple look at how your icing should appear......just ignore the sound of my voice.

And before you ask.....yes, I'm from New Orleans.

Hope the tutorial was informative. I'm new to this and you never know what to say when your on camera.....need some cue cards and a helpful teenager.....hmmm, maybe for next time. I know just the teenager that would do great on camera, maybe because she is constantly recording herself and taking pictures with the "duck" face....you know the pose. 

So.... Miss B if you're reading......I've got a job for you.....but please, no "duck" faces.
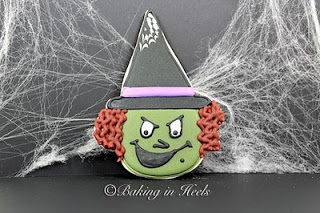
Double, Double, Toil and Trouble

I love cookie cutters.  There's just something exciting about them.  Maybe it's because they remind me of momma a little bit, I'm not sure.

 There are so many different ones out there.  Most cutters are fairly inexpensive, but some of them can be quite costly.  If you're not careful though you'll be broke in a matter of months.......or if you're as OCD as me and

need

them all, in a matter of days or weeks.

One of the blogs I read every day is

The Sweet Adventures of SugarBelle

. The blog writers name is Calley and she really has a fantastic eye for things.  She will take a simple cookie cutter intended for one thing and make something totally different.  One example is her

gumball machine cookies

.  Truly amazing.

I've made many of Calley's cookies. I've even made quite a few on my own, but as they intended to be.  If its a bat cutter I make a bat,  an owl I make an owl, etc. 

This time I decided to try something new, to do something different.  I needed to use my cookie cutter for a cookie that it wasn't intended for.

After all.....It's what all the

cool

kids are doing. 

It couldn't be too hard right? Like making out pictures with the clouds right?  Well...it was harder than I thought.  After a bit of searching through my cutters.......

four hours later

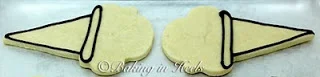
......a light bulb went off.  My light bulb takes a bit longer than most to go off.....I'm slow.  I took my copper ice cream cone cutter and made a witch. 

 I know it's not extremely creative, but hey I'm new to this.  I gotta start somewhere right?  Maybe one day I'll be as creative as all the cool kids but for now you get a witch from an ice cream.

To make the witch cookies you will need:

Ice cream cone cookies

royal icing in green, black, white and reddish brown. (I was going for a reddish color but this was what I got)

tip #2

icing bags 

First cut, bake, and cool your cookies on a wired rack. 

After cookies are cooled pipe outline of hat in black royal icing with a #2 tip.

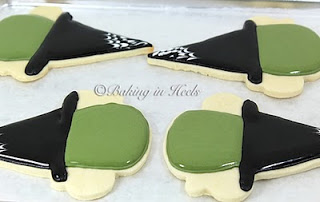
 Next outline the witch's face in green royal icing

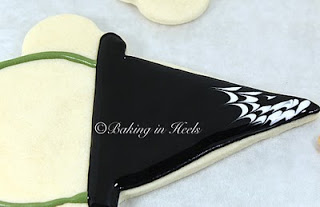
Thin out some of the black royal icing. I normally use about a 10 second icing for this. Meaning, when you let the icing fall back into itself it takes 10 seconds until it's smooth again. Fill in hat with the 10 second icing. 

While the black icing is still wet I piped three rows of 10 second icing in white on top of the hat.

Then drug a toothpick through it several times to form a cob web. (while still wet)

Next fill in witch's face with green flood icing. Allow to dry for an hour or two.

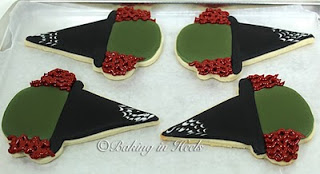
Next I piped the first layer of squiggly lines for the witch's hair with royal icing. Let the hair dry for about an hour.

After that dried I piped a second layer of hair, filling in the empty spaces and giving it a more 3D look.

Then I piped on the face. I messed up on the eyes as shown below. Somehow I didn't fill in the entire eye white.....so after it was dried I used a toothpick to remove the center part of the eye and filled in with white then black dots for the pupils.

I added a purple band around hat after it was dry, but totally forgot to take a picture....Hey I can't remember everything. 

After the cookie has dried overnight display on a black background with some Halloween spider web decorations......Just like the

cool

girls do and take a pretty picture. 

Hope you enjoyed the tutorial. Please leave loving, good job, pat on the back comments because its the nice thing to do......You know your momma would want you to.