Taxi Cab Cookie

I went to New York City once as a child. I hardly remember it. We were just passing through on our drive to Canada. Yes, for some reason my mother thought it would be great fun to drive to Canada.....from New Orleans!
Four kids.....two adults.....crammed in a little car. Let's just say the drive was not so fun.
We did have a great time in Canada though and all the stops along the way. My mother always did know how to plan a vacation.
Now that I'm all grown up, I really do want to take a trip to NYC. I'm dying to see Wicked.
I had the opportunity to make some NYC Themed cookies a while back. Since I never had a taxi cutter, I hand cut each and every one. That was a cramp. I contacted Tracy from Whisked Away Cutters and had her make make me two custom cutters from my designs. All I had to do was submit the designs to her and she handled the rest. She was great to work with and got the cutter made and sent to me very quickly! Did I mention how much I love her cutters?? I may have a time or two lol.
These cookies have been a big hit so I thought I'd share with you how to make one of my favorites from the set.
First you'll need:
- Royal icing (light blue, white, black, yellow, grey)
- Taxi cab cookie cutter (If you don't have one, you can find the one I designed here)
- Baked and cooled taxi cookies
- piping bags and couplers
- #2 tip
- #1.5 PME tip for details
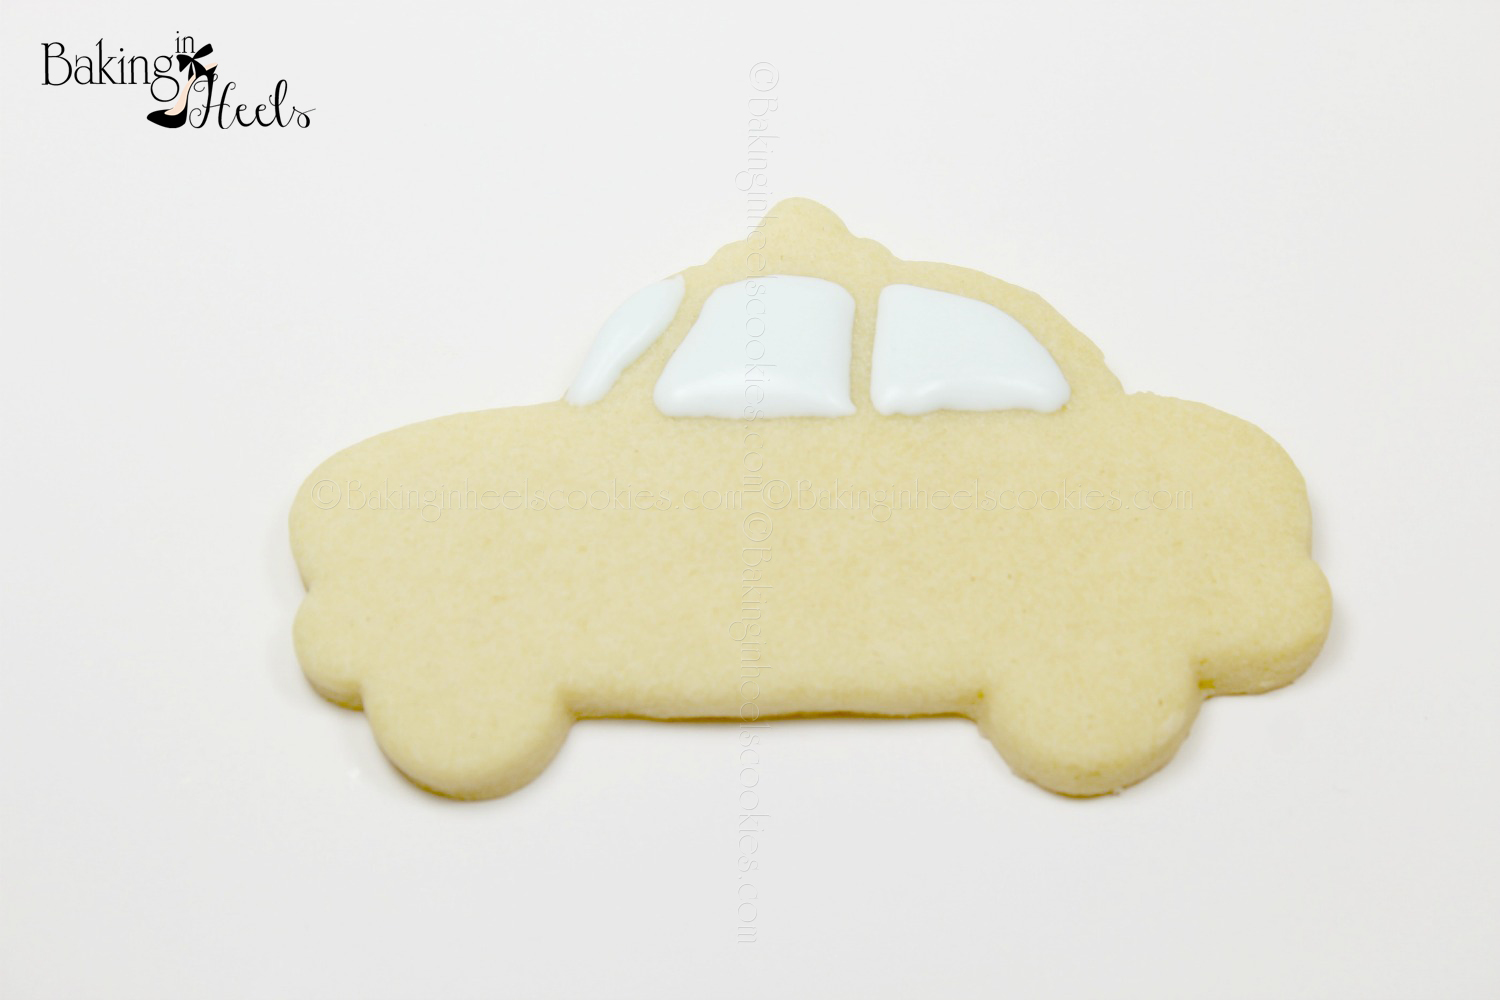
1. Outline and fill windows with light blue icing, let dry.

2. Outline taxi in yellow piping icing.

3. Fill in yellow sections of taxi with 20 second yellow icing. Work in sections, allowing each section to dry 30 min before filling in the sections right next to the one you just did.

4. Next, outline the tire with black piping icing. Then fill, leaving a small circle in the center.

5. Fill in grey sections of tires. Add a bumper and fender with grey icing. Allow to dry.
6. Fill in white headlight, taxi sign on top of the taxi, and add two little accent lines on the window.

7. Add tiny dots with grey piping icing on the tire rims. Use a PME 1.5 tip.
8. To make the checkered print down the side of the taxi, just add small black squares with black piping icing. Be sure to leave a space for the white squares. Allow to dry for 30-40 minutes, longer if you have bleeding issues.

9. Add the white squares.
10. Add Taxi with black piping icing, using a PME 1.5 tip. Icing consistency is very important. As you can see from the picture above, my icing was a little too watery.
11. Add details in yellow with yellow piping icing and a PME 1.5 tip. Paint on silver luster dust. Let the cookie dry completely.
These Taxi cab cookies will be a huge hit at your next event. You can serve them alone or pair them up with some other NYC themed cookies!
I'm really loving my new custom cutters. Check back soon and I'll show you the other custom cookie cutter I got!